10 Vinyl Window Installation Tips for Global Buyers
For global buyers, vinyl window installation is not a simple matter of fitting a frame into a wall opening. Climate, wall construction, drainage design, glass performance, and local installation standards all change the result. The U.S. Department of Energy reports that heat gain and heat loss through windows can represent 25–30% of residential heating and cooling energy use. That figure gives installation a practical meaning: a small gap around the frame can become a daily energy penalty.
Building-performance educator Matt Risinger states, “The best window in the world will fail if it is installed poorly.” The warning is blunt. It is also easy to underestimate. A professional installer should check the rough opening, confirm sill support, maintain manufacturer-required clearances, and integrate flashing with the weather-resistive barrier. The sealant bead should be continuous, but it should never replace proper drainage. A neat bead is not proof of durability.
Global projects need additional caution. NFRC ratings help buyers compare U.S.-market products, while EN 14351-1 and ISO 10077 may guide European performance evaluations. These systems are not automatically interchangeable. Buyers should request tested U-values, air-leakage data, water-resistance results, installation instructions, and warranty conditions. The UNEP Global Status Report for Buildings and Construction also highlights the buildings sector’s significant energy and emissions burden, making efficient windows relevant beyond one property.
Details matter. A level sill matters. So does a dry substrate. Even experienced teams make mistakes when drawings, products, and site conditions disagree. This guide examines ten practical vinyl window installation tips for buyers who need reliable performance, not merely attractive frames.
Define Climate and Code Needs with NFRC U-Factor and SHGC Ratings
10 Vinyl Window Installation Tips for Global Buyers
For global buyers, vinyl window selection should begin with climate, not appearance. The NFRC U-factor measures heat transfer through the complete window assembly. Lower values generally mean better insulation. The NFRC SHGC shows how much solar heat enters through the glass. Lower SHGC can reduce overheating in hot regions, while higher SHGC may support passive warmth in colder climates. The U.S. Department of Energy reports that windows can account for 25–30% of residential heating and cooling energy use. Small rating differences can matter.
Tip: Match the rating to the building site. In a cold climate, prioritize a low U-factor and check local condensation risks. In a hot, sunny climate, compare low SHGC values, exterior shading, and glass orientation. Do not copy one specification worldwide. A coastal home, desert apartment, and mountain cabin need different decisions.
Codes also deserve careful attention. NFRC-certified ratings provide comparable performance data, but local energy codes may require specific U-factor, SHGC, air-leakage, or safety features. The International Energy Conservation Code uses climate zones, yet regional amendments can change requirements. Ask for the complete NFRC label, installation instructions, and test evidence. Tip: Verify the rough opening, drainage path, flashing method, and wall insulation before ordering. I have seen attractive windows perform poorly because installation gaps were ignored. Ratings describe tested products, not careless workmanship.
Confirm Performance Using Air Leakage ≤0.3 cfm/ft² and Water-Test Ratings
10 Vinyl Window Installation Tips for Global Buyers
Confirm air performance before comparing prices. The U.S. ENERGY STAR Residential Windows, Doors, and Skylights criteria specify air leakage of ≤0.3 cfm/ft² at 75 Pa. This threshold helps limit drafts around a closed vinyl sash. Ask for test results under ASTM E283 or NFRC 400 procedures. Do not rely on a sales brochure alone. Ask for the report.
Water resistance needs a separate check. The AAMA/WDMA/CSA 101/I.S.2/A440 standard uses Performance Grade and water penetration testing. ASTM E331 applies steady pressure, while ASTM E547 uses repeated spray cycles. A higher design pressure may suit coastal or high-rise exposure, but it does not automatically guarantee perfect installation. Details matter. Request the tested water pressure, specimen size, and window configuration.
At the job site, level the sill and keep drainage paths clear.
Low-expansion foam should fill gaps without bowing the vinyl frame. Sealant must follow the tested installation method, not a convenient shortcut. AAMA 501.2 can support field inspection, yet it is not a replacement for laboratory testing. One practical warning remains: a window may pass in the lab and leak after poor shimming, blocked weep holes, or uneven masonry. Buyers should review climate, wind exposure, wall design, and installer records together. I would also recheck the specification; imported drawings sometimes list pressure units inconsistently.
Prepare the Opening with a 6–19 mm Gap Around the Window Frame
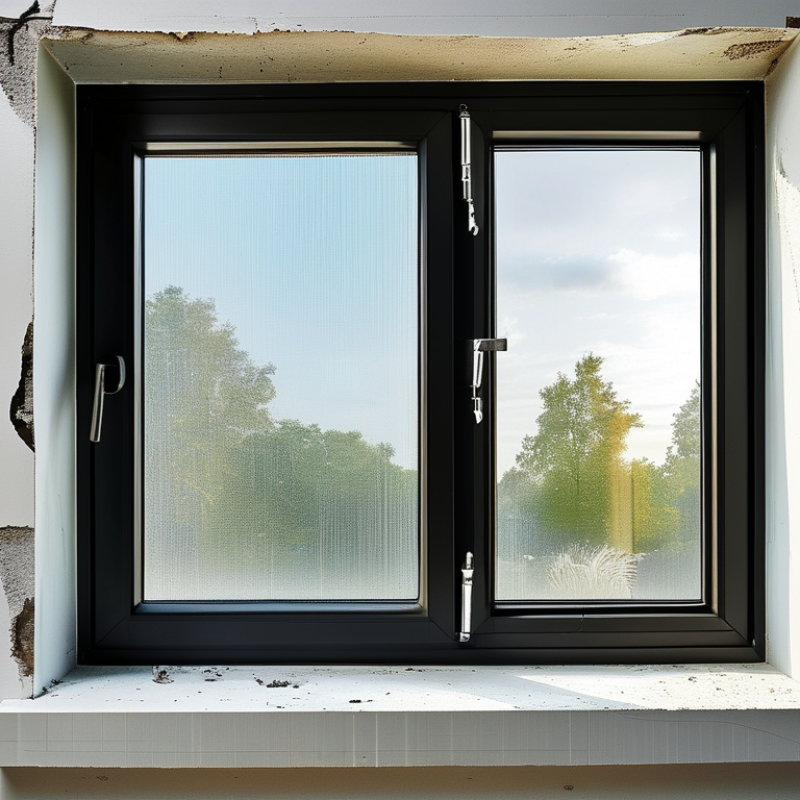
Prepare the rough opening before the vinyl window arrives. The opening should be 6–19 mm wider and taller than the outside frame dimensions. This space creates room for shimming, insulation, and small changes caused by temperature. Measure the width at the top, center, and sill. Then check the height at both sides and the center. Record the smallest measurement, not the most convenient one. A square opening matters more than a visually clean opening.
Remove loose mortar, dust, and damp debris from the opening. Check the sill with a level, then inspect the corners for twisting. I have seen installers force a frame into a tight opening. The sash later dragged, even though the frame looked straight. Do not correct a badly sized opening with excessive foam. Foam can push the frame inward and reduce operating clearance. Use durable shims at load points, keeping drainage paths clear. Leave the planned gap continuous around the frame.
After dry-fitting, confirm the frame is centered without pressure. The gap should not disappear at one corner. A 6 mm gap may suit a stable, accurately built opening. A 19 mm allowance may be safer where materials move more. That judgment needs site evidence, not guesswork. Consider local climate, wall construction, and the window supplier’s installation instructions. I sometimes remeasure after shimming; it feels slow, but prevents avoidable corrections. Seal the joint according to the approved installation method, while keeping the sill able to drain.
Install in Sequence: Level, Plumb, Square, Flash, and Insulate
10 Vinyl Window Installation Tips for Global Buyers
Install in Sequence: Level, Plumb, Square, Flash, and Insulate
A reliable vinyl window installation starts with the opening, not the frame. Remove dust, loose mortar, and damaged sheathing around the rough opening. Check the sill with a 1.2-meter level. Small errors here can affect the entire window. I usually place temporary shims before lifting the frame into position. Keep the sill level, then check both side jambs for plumb. Do not force a twisted frame into place.
Next, measure the diagonals from corner to corner. Matching measurements usually confirm a square opening. Leave the manufacturer’s recommended clearance for movement and adjustment. Secure the frame through approved fixing points, but avoid overtightening. The vinyl can bow inward, making the sash difficult to operate. Test the sash several times. It should open smoothly without scraping.
Flashing needs careful sequencing. Install sill flashing first, then jamb flashing, and finally head flashing where the wall design requires it. Overlap each layer so water moves outward, never inward. Use compatible sealants and follow local weatherproofing requirements. After testing the window, fill the perimeter gap with low-expansion insulation. Do not pack it tightly. Excess pressure can distort the frame. A rushed project I observed looked straight from outside, but the sash dragged after insulation was added. The installer had skipped a final plumb check. Small details matter.
Verify Operation, Drainage, Fastener Spacing, and Final Seal Quality
10 Vinyl Window Installation Tips for Global Buyers
Tip 1: Verify Operation and Drainage
Before final fixing, open each sash several times. It should move smoothly without rubbing, lifting, or sudden resistance. Check the locking points from inside and outside. A window can look level but still operate poorly. I once found a slight frame twist after the screws were tightened. That small error affected the entire sash. Pour a little clean water into the drainage path. Water should exit through the designed weep holes, not collect inside the sill. Keep these openings free from mortar, dust, and protective film.
Tip 2: Check Fastener Spacing
Use the approved fixing pattern for the window size and wall condition. Fasteners need consistent spacing around the frame, with extra attention near corners and load points. Do not overtighten them. Excessive pressure can bow the vinyl frame and reduce sash clearance. A practical check is to place a straightedge along the jamb. Small gaps may reveal distortion. Measure twice. Records of screw locations and substrate conditions also help during inspections.
Tip 3: Inspect the Final Seal
The perimeter seal should be continuous, firm, and properly bonded. Look closely at corners, sill ends, and transitions between materials. These areas often receive less attention. The joint should allow suitable movement without tearing. Remove loose sealant and rework it; covering a weak section rarely solves the problem. On windy or rainy projects, I prefer a second inspection after curing. Even experienced installers miss short gaps. That is worth remembering.
10 Vinyl Window Installation Tips for Global Buyers
Brand-neutral field verification targets for operation, drainage, fastener spacing, and final seal quality.
The chart uses common installation reference targets: full sash operation, clear drainage paths, fasteners typically spaced no more than 16 in (406 mm) on center, corner fasteners placed approximately 4–6 in (100–150 mm) from corners, and continuous sealant coverage. Always confirm local codes and the specific product installation instructions.